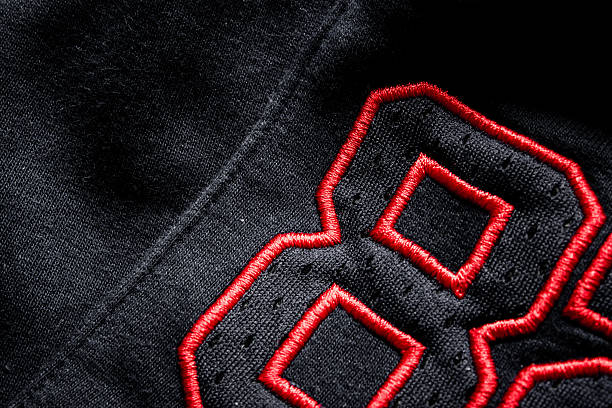
In streetwear and premium athleisure, large letter embroidery across the chest or back is a hallmark design element. However, when executing high-density, large-format embroidery on heavy-gsm oversized hoodies, apparel brand managers and sourcing teams frequently run into a frustrating quality defect: severe fabric puckering around the lettering.
This puckering—where the heavy fleece fabric ripples, pulls, or warps around the embroidery border—is rarely caused by a faulty embroidery machine alone. Instead, it stems from a mismatch between fabric elasticity, thread tension dynamics, stabilizer backing selection, and digitizing density. Sourcing high-quality custom streetwear hoodie embroidery requires treating large-format stitching as an integrated engineering system.
1. Engineering Matrix: Causes vs. Technical Solutions for Fabric Puckering
Understanding the interaction between heavy fleece fabrics ($300\text{–}450\text{ GSM}$) and embroidery parameters enables technical teams to eliminate structural distortion:
| Defect Factor | Physical Mechanism | Root Cause | Engineering Solution |
| Thread Pull Tension | High-density stitches contract during formation, pulling flexible knit loops inward | Excessive upper thread tension or uncalibrated bobbin tension | Calibrate lower bobbin tension; apply underlay fill stitches to stabilize the knit |
| Stabilizer Backing Failure | Fabric stretches under hoop pressure and snaps back after unhooping | Using soft tear-away backing instead of rigid cut-away backing | Use 2.5–3.0 oz firm Cut-Away stabilizer with temporary spray adhesive |
| Digitizing Stitch Density | Excessive stitch density overloads heavy fleece, puncturing underlying yarns | Standard digitizing files applied directly to heavy $400\text{ GSM}$ fleece | Reduce stitch density by $15\%\text{–}20\%$; use variable angle Tatami fill layers |
| Hooping Alignment Drift | Heavy oversized panels sag during high-speed multi-head stitching | Manual hooping alignment errors on large cut-piece fabric panels | Implement pneumatic hooping fixtures with laser positioning guides |
2. 3 Core Technical Protocols for Large-Format Hoodie Embroidery
Eliminating puckering and placement drift on heavy fleece panels requires three foundational production steps:
Large-Format Embroidery Workflow: 3 Key Steps for Consistent Results
Large-format embroidery requires careful stitch planning, proper stabilizer selection, and precise machine calibration. Following a structured embroidery workflow helps improve stitch consistency, panel alignment, and production quality.
Step 1: Embroidery Digitizing and Underlay Stitch Planning
Start with embroidery digitizing to optimize stitch density and underlay placement for large designs. A programmed lattice underlay network can help support the embroidery structure and improve fabric coverage. Adjust stitch density according to the design, fabric type, and thread requirements to help reduce excessive bulk and puckering.
Step 2: Cut-Away Stabilizer Selection and Hooping
Choose a suitable stabilizer backing to support the fabric throughout the embroidery process. A 2.5–3.0 oz cut-away stabilizer is a potential option, depending on fabric weight, design density, and project requirements. Pair the backing with a compatible pneumatic hooping system to help maintain stable fabric tension and consistent positioning during production.
Step 3: Embroidery Tension Calibration and Laser Panel Alignment
Calibrate the upper thread and bobbin tension before production to achieve balanced stitches and reduce thread-related defects. For large-format or multi-panel embroidery, use laser alignment to establish the panel origin and maintain consistent placement between sections. Run a test stitch-out and verify tension, registration, and overall stitch quality before proceeding with full production.
Key Takeaway
A reliable large-format embroidery workflow combines optimized digitizing, appropriate cut-away stabilizer backing, and accurate machine calibration. Validate stabilizer weight, hoop compatibility, thread tension, and laser alignment through sample testing before mass production.
1. Digitizing Logic: Underlay Stitches and Density Reduction
Plunging high-density satin or fill stitches directly into loopback fleece causes the needles to push down the fabric pile, causing structural pull.
-
Lattice Underlay: Digitizers must program an extensive edge-walk and grid lattice underlay first. This anchors the fleece loops and creates a flat, rigid foundation before applying decorative top stitches.
-
Density Calibration: For letters spanning over $20\text{ cm}$, stitch density should be reduced by $15\%\text{–}20\%$ while increasing thread weight (e.g., using 30-weight thread instead of standard 40-weight).
2. Selecting the Correct Stabilizer Backing
Heavyweight fleece ($300\text{–}450\text{ GSM}$) possesses inherent diagonal stretch.
-
Tear-Away vs. Cut-Away: Tear-away backings break down during high-speed needle penetrations, providing zero long-term stability. Large lettering requires Cut-Away stabilizer ($2.5\text{–}3.0\text{ oz}$ weight).
-
Soluble Topping: A thin water-soluble film (Solvy) must be placed on top of the fleece during stitching to prevent individual stitches from sinking into the deep fabric pile.
3. Controlling Hooping Strain and Panel Alignment
Oversized hoodie panels are heavy and bulky. When hooped manually, operators often pull the fabric taut, stretching the knit loops. Once the hoop is removed post-stitching, the stretched fabric relaxes, causing immediate perimeter puckering. Using pneumatic hooping station controls ensures consistent, non-stretch fabric holding across batch runs.
3. B2B Procurement FAQs
Q1: What is the acceptable tolerance for embroidery placement deviation on oversized hoodies?
For large chest or back letter embroidery on oversized cut panels, the industry standard placement tolerance is $\le \pm 5\text{ mm}$ from the center alignment axis. Because oversized drop-shoulder seams vary visually, alignment must be measured relative to the front neck drop apex rather than the shoulder seams.
Q2: Does using heavy Cut-Away stabilizer backing affect wearer comfort?
When selected correctly, no. While Cut-Away backing remains permanently inside the garment, modern high-end streetwear production uses soft-touch, loop-backed cut-away materials or applies a soft fusible cover tricot over the back of the finished embroidery. This protects skin from thread friction while maintaining permanent lettering structure through repeated wash cycles.
Q3: Does large-format letter embroidery incur extra manufacturing charges?
Yes. Embroidery pricing is calculated based on total stitch count, machine run-time, and frame size. Large chest lettering often requires $40,000$ to $80,000+$ stitches compared to $5,000$ stitches for a small left-chest logo. Additionally, large frames require running multi-head machines at reduced speeds ($600\text{–}700\text{ RPM}$) to prevent needle deflection, increasing machine time.
Key Technical Takeaways
-
Digitizing is the Foundation: Eliminate puckering at the design stage by programming strong grid underlays and reducing top-stitch density on heavy fleece.
-
Cut-Away Backing is Mandatory: Never use tear-away backing for large-format lettering on stretch knits; specify $2.5\text{–}3.0\text{ oz}$ Cut-Away stabilizer for long-term shape retention.
-
Pneumatic Hooping Consistency: Utilize pneumatic hooping tools and laser alignment guides to avoid pre-stretching fabric during hooping and to eliminate placement drift across production batches.
Optimize Your Custom Apparel Manufacturing
Executing high-density, large-format embroidery on heavyweight streetwear requires combining precise digitizing logic with robust factory quality control. Consult with specialized apparel production technicians to review digitizing files, backing specifications, and wholesale manufacturing options for your upcoming streetwear collections.