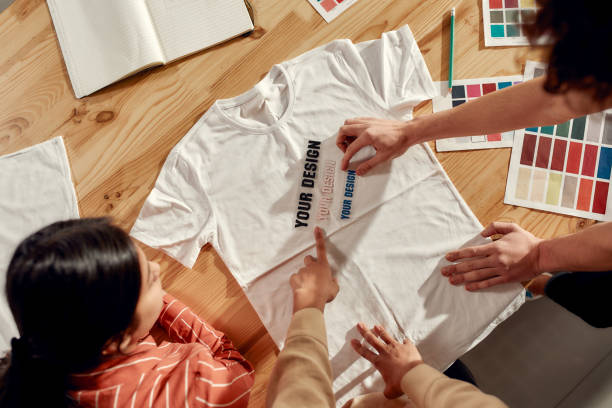
Launching a custom printed apparel collection allows wholesalers to build a recognizable private label, differentiate their products, and create a more consistent offering for retail customers. However, turning a design concept into saleable clothing requires more than choosing a print and finding a factory. Buyers must prepare artwork, confirm product specifications, understand minimum order quantities (MOQ), approve samples, match colors, and coordinate bulk production and delivery.
A clear development process helps reduce avoidable revisions, control costs, and prevent misunderstandings between buyers and manufacturers. Whether you plan to launch printed T-shirts, sweatshirts, hoodies, or other custom garments, this guide explains each stage of the process and the decisions to make before moving forward.
Step 1: Define Your Collection Before Contacting a Manufacturer
Before requesting a quotation, clarify what you want to sell and how each garment should represent your brand. A clear brief helps a custom apparel manufacturer assess feasibility, recommend suitable materials, and estimate production costs more accurately.
Choose Your Product Types and Target Customers
Start by identifying the garments in your planned collection.
For example, your initial range may include:
- Printed T-shirts for everyday retail
- Graphic sweatshirts for seasonal collections
- Custom hoodies for streetwear brands
- Printed polo shirts for lifestyle or promotional markets
- Coordinated tops designed around a shared theme
Next, define your target customers, expected retail positioning, preferred fabric quality, and target launch date.
A premium streetwear collection may require heavier fabrics, oversized silhouettes, distinctive prints, and custom woven labels. A promotional apparel range may prioritize cost efficiency, simpler decoration, and shorter development cycles.
These differences affect material selection, printing methods, branding options, and production costs.
Prepare a Basic Product Specification
You do not always need a complete technical package before contacting a manufacturer. However, providing essential information makes the first quotation more useful.
| Specification | What to Provide |
|---|---|
| Garment type | T-shirt, hoodie, sweatshirt, or other style |
| Fabric | Preferred composition, weight, or reference sample |
| Fit | Regular, slim, oversized, cropped, or custom |
| Artwork, print dimensions, placement, and preferred method | |
| Colors | Existing fabric colors or Pantone references |
| Sizes | Size range and estimated quantity per size |
| Branding | Neck labels, care labels, hangtags, and packaging |
| Delivery | Destination market and required arrival date |
If some details remain undecided, mark them as provisional. Your manufacturer can help you evaluate practical options before final approval.
Step 2: Submit Print Artwork in the Right Format
Artwork preparation is one of the first technical steps in developing a custom printed apparel collection. Incomplete files, unclear dimensions, and missing placement instructions can delay sampling or produce results that differ from your expectations.
Why Vector Artwork Is Preferred
Whenever possible, submit your original design in a vector format such as AI, EPS, or vector PDF. SVG may also be suitable, depending on the manufacturer’s workflow.
Vector artwork stores shapes and paths rather than relying entirely on a fixed grid of pixels. This makes logos, typography, and many graphic elements easier to resize without losing edge sharpness.
For raster artwork, such as photographs or textured illustrations, provide a high-resolution file at the intended print size. Confirm the manufacturer’s resolution requirements before submission.
Before sending your files, check the following:
- Convert fonts to outlines or include the required font files.
- Embed or package linked images.
- Identify all print colors and special effects.
- Confirm the final artwork dimensions.
- Separate artwork by garment color or print location when necessary.
- Provide a reference image showing the intended placement.
Vector files do not automatically guarantee print readiness. Fine lines, tiny text, overlapping shapes, and complex gradients may still require adjustments for the selected printing method.
Provide a Clear Artwork Placement Guide
A manufacturer needs to know not only what to print but also where to print it.
For example, a design may require a front chest graphic, a large back print, and a small sleeve logo. Specify the approximate dimensions and the distance from relevant garment reference points.
You can provide a simple annotated mockup with front, back, and side views.
Your placement guide should include:
- Print width and height
- Position relative to the neckline, shoulder seam, or hem
- Left and right sleeve placement, where applicable
- Intended garment color
- Any required spacing between multiple graphics
For a collection containing several styles, label every artwork file with the corresponding product code or style name. This reduces the risk of applying the wrong design to a garment.
Confirm the Printing Method With Your Supplier
Different printing methods suit different artwork styles, fabrics, order quantities, and performance requirements.
| Printing Method | Common Applications | Key Consideration |
|---|---|---|
| Screen printing | Bold graphics and repeat production | Setup requirements may increase the cost of designs with many colors |
| DTG printing | Detailed, multicolor artwork on suitable garments | Results depend on fabric composition, pretreatment, and equipment |
| DTF transfers | Detailed graphics across various suitable garment types | Transfer feel, adhesion, and durability need evaluation |
| Heat transfer | Logos, lettering, and selected decorative effects | Material compatibility and application conditions matter |
No single method is ideal for every design. Ask your supplier to recommend a method based on the artwork, fabric, quantity, and intended use.
Before sampling, request a digital proof showing the print size, position, and garment color. A digital proof helps confirm the layout, but it cannot fully reproduce the texture, handfeel, or exact appearance of the finished print.
Step 3: Confirm MOQ, Pricing, and Order Structure
The minimum order quantity, or MOQ, is the smallest order a manufacturer will accept under specified production conditions. For wholesalers launching a private label, understanding the MOQ structure is essential for managing inventory risk and startup costs.
Understand What the MOQ Applies To
A manufacturer may set different minimums for different order configurations.
The MOQ could apply to:
- Each garment style
- Each fabric or garment color
- Each custom-dyed color
- Each print design
- Each size or production batch, depending on the factory’s policy
For example, a supplier may allow several sizes within one style MOQ but require a separate minimum for every custom fabric color. Another supplier may use different minimums for screen printing, embroidery, or fully custom cut-and-sew garments.
Therefore, do not ask only, “What is your MOQ?”
Instead, ask: “What is the MOQ per style, per color, and per print design, and can I mix sizes within the same order?”
This question helps you understand the actual quantity required to launch the collection.
Balance Product Variety With Inventory Risk
A common mistake is launching too many styles, colors, and prints in the first order. Although a broad collection may look attractive, each variation can divide the available budget and increase inventory complexity.
A more controlled approach is to begin with a focused product range.
For example, you could launch two garment styles with a limited number of colors and a coordinated graphic theme. You can then expand the range after evaluating customer demand.
When comparing manufacturers, assess more than the lowest MOQ. Consider sample costs, unit pricing, customization flexibility, quality consistency, and the cost of repeating the same design later.
Request an Itemized Quotation
A useful quotation should make it clear which services are included in the unit price.
Ask your supplier to separate or explain the costs associated with:
- Fabric and garment construction
- Printing or other decoration
- Custom labels and trims
- Hangtags and packaging
- Sampling and development
- Special finishing or washing
- Quality inspection
- Freight, duties, and other applicable charges
Also confirm the quotation’s validity period, payment terms, production assumptions, and any charges for design revisions.
A low unit price may not represent the lowest total cost if important customization services, packaging, or shipping expenses are excluded.
Step 4: Develop and Approve Your Samples
Sampling allows buyers to evaluate the actual garment before committing to bulk production. It is one of the most important stages in a custom printed apparel collection because it reveals issues that a digital mockup cannot show.
What Happens During Sampling?
After reviewing your specifications, the manufacturer may develop a sample using the proposed fabric, construction, print, and branding components.
Depending on the project, the development process may involve:
- Reviewing the design and technical requirements
- Confirming fabric availability and construction details
- Preparing the print artwork and placement
- Producing the garment sample
- Checking measurements, appearance, and workmanship
- Revising the sample if necessary
Sampling time depends on garment complexity, material availability, decoration requirements, and how quickly the buyer provides feedback. Ask the supplier to confirm the estimated sample schedule before development begins.
Inspect the Sample Using Clear Criteria
Do not approve a sample based only on whether it looks attractive.
Evaluate the garment against the original product specification.
Fit and measurements
Check chest width, body length, shoulder width, sleeve length, and other relevant measurements. Compare them with the approved size chart.
Fabric and construction
Review fabric handfeel, weight, stitching, seams, hems, and overall garment structure.
Print appearance
Check color, sharpness, dimensions, alignment, placement, and consistency with the approved artwork.
Branding
Confirm the position and readability of neck labels, care labels, size labels, hangtags, and other brand elements.
Wear and care requirements
Where relevant, assess print performance and garment appearance after the intended washing process. Confirm any testing requirements before bulk production.
Use a Clear Sample Approval Process
When a sample needs revision, provide consolidated feedback rather than sending separate, conflicting instructions over several days.
For example:
- Reduce the front graphic width to the approved measurement.
- Move the back print upward by the specified distance.
- Adjust the body length to match the size specification.
- Replace the label artwork with the final approved file.
Record the sample revision number and approval date. Keep the final approved sample as a reference for bulk production and subsequent reorders.
Important: Confirm whether the approved sample represents the intended bulk fabric, print method, color, and finishing process. If the supplier changes a major material or production detail, request confirmation before authorizing the change.
Step 5: Match Colors With Pantone References
Color consistency is particularly important when a collection contains several garments or when you plan to reorder products over time. However, a color displayed on a monitor may look different from the color produced on fabric or through a printing process.
Pantone references help buyers and manufacturers communicate color targets more precisely, but they do not eliminate every source of variation.
Provide the Correct Pantone Reference
When specifying a color, identify the relevant Pantone system and reference number rather than sending only a screenshot.
Different references serve different applications. Pantone FHI systems include textile-oriented references such as TCX for cotton-based textile color standards and TPG for paper-based textile color guidance. Pantone graphics systems may be more appropriate for certain print workflows.
The correct reference depends on whether you are specifying garment fabric, printed graphics, thread, or another component.
Tell your manufacturer exactly which part of the product the reference applies to.
For example:
- Main garment fabric: specified textile color reference
- Front graphic: specified print color reference
- Embroidered logo: approved thread color reference
- Neck label: approved label artwork and color
A single Pantone number should not automatically be assumed to produce an identical result across different materials and processes.
Approve a Physical Color Sample
For custom-dyed fabric, suppliers may prepare a lab dip, which is a small dyed fabric sample for color evaluation.
For printed graphics, the supplier may prepare a print strike-off or another physical proof using the intended printing process.
Review the sample under consistent lighting and compare it with the agreed reference. If color is critical, define the evaluation conditions and acceptable tolerance before approval.
Check:
- Overall color appearance
- Shade differences between components
- Color consistency across the garment
- Whether the print contrasts correctly with the fabric
- Whether the selected color remains suitable for the brand’s intended appearance
Do not approve a custom color based solely on a phone photograph. Photography, display settings, and lighting can affect perceived color.
Record Color Decisions for Future Reorders
Once the color is approved, record the reference number, physical sample identification, material, and relevant production details.
This documentation helps the supplier reproduce the intended color more consistently across later production runs.
However, even when a Pantone reference remains unchanged, differences in fabric composition, dyeing conditions, print method, and finishing may affect the final appearance. Reconfirm critical colors when the production material or process changes.
Step 6: Finalize Private Label Branding and Packaging
A private label collection should carry a consistent brand identity from the garment itself to the packaging.
Before bulk production, confirm every branding component and its position. Late changes can require new artwork, additional materials, or rework.
Choose Your Branding Components
Depending on the garment and brand positioning, your order may include:
- Woven or printed neck labels
- Size labels
- Care and fiber-content labels
- Hangtags
- Branded polybags or alternative packaging
- Carton labels and SKU information
Confirm the exact wording, dimensions, colors, placement, and attachment method for each item.
Care-label wording and fiber-content declarations should meet the applicable requirements in your destination market. Do not assume that the same label format is suitable for every country.
Check Packaging Requirements Before Production
Packaging affects storage, shipping, and retail presentation. Specify how each garment should be folded, packed, labeled, and grouped.
For wholesale orders, confirm:
- Quantity per polybag or package
- Size and color identification
- SKU or barcode requirements
- Carton quantities and dimensions
- Shipping marks and destination information
If the collection includes several styles, provide a clear packing matrix. This helps prevent size mixing, incorrect labels, and shipment discrepancies.
Step 7: Schedule Bulk Production and Delivery
After sample approval, the manufacturer can finalize production planning. However, the bulk schedule should not be treated as a single fixed number of days without considering material sourcing, customization, production capacity, and shipping.
Build a Realistic Production Timeline
A typical project may include the following stages:
| Stage | Main Activities | What Can Cause Delays |
|---|---|---|
| Design confirmation | Artwork, measurements, specifications | Missing files or unclear instructions |
| Sampling | Garment development and revisions | Material availability or repeated changes |
| Color approval | Lab dips, print proofs, or physical swatches | Slow feedback or color revisions |
| Pre-production approval | Final sample and order details | Unresolved specifications |
| Material preparation | Fabric, labels, trims, packaging | Custom sourcing or supplier delays |
| Bulk production | Cutting, printing, sewing, finishing | Capacity constraints or quality issues |
| Final inspection | Quantity, measurements, appearance, packing | Defects requiring correction |
| Shipping | Export preparation and transportation | Customs, carrier schedules, or destination requirements |
The total lead time depends on how these stages overlap and which materials are available. A custom-dyed fabric or newly developed garment may require more preparation than a design using existing materials.
Work Backward From Your Launch Date
Instead of asking only how quickly a factory can produce your order, calculate when the goods must be ready for sale.
Allow time for sample review, revisions, production, inspection, and shipping. Include a contingency period for unexpected issues.
For example, if you plan a seasonal launch, set an internal deadline for final sample approval well before the intended delivery date. This gives the manufacturer time to resolve problems without immediately threatening the launch.
Confirm the Production Start Conditions
Before authorizing bulk production, confirm in writing:
- Final order quantity and size breakdown
- Approved sample and specifications
- Final artwork and color references
- Branding and packaging requirements
- Unit price and payment terms
- Production lead time and estimated completion date
- Inspection standards and defect-handling process
- Shipping method, destination, and delivery assumptions
Also clarify when the lead-time clock starts. Some suppliers calculate production time after sample approval, while others require approved materials, deposit payment, or final packaging details before scheduling production.
A confirmed production date is more useful when both parties understand the conditions behind it.
Step 8: Inspect Bulk Goods Before Shipment
Sample approval establishes the target, but bulk inspection checks whether the delivered order matches that target.
A well-organized quality-control process can identify issues before the garments leave the factory.
Check the Critical Quality Points
For a custom printed apparel collection, focus on:
Quantity and assortment: Verify total quantities by style, color, and size.
Measurements: Sample garments across relevant sizes and compare them with the approved specifications.
Print quality: Check print placement, color, coverage, and visible defects.
Construction: Review seams, stitching, hems, and other workmanship details.
Branding: Confirm label wording, attachment, hangtags, and packaging.
Carton preparation: Check carton quantities, shipping marks, and packing instructions.
Agree on an inspection method before production begins. For larger orders, a documented sampling plan and defined acceptance criteria can make inspection decisions more consistent.
If the inspection reveals a problem, record the defect, affected quantity, and proposed corrective action. Agree on the resolution before shipment rather than relying on informal assurances.
Common Mistakes When Launching a Private Label Apparel Collection
Even a straightforward project can experience delays when buyers overlook a few basic decisions.
Sending Artwork Without Placement Instructions
A factory may reproduce the graphic correctly but position it differently from your intended design.
Solution: Provide an annotated garment mockup, final dimensions, and reference points.
Confirming MOQ Without Understanding Its Scope
A minimum may apply separately to styles, colors, or custom materials.
Solution: Confirm the MOQ structure and permitted size or color assortment in writing.
Approving Colors From Screenshots
A screen image cannot reliably establish the final appearance of printed or dyed fabric.
Solution: Use a defined color reference and approve a physical sample when color accuracy matters.
Starting Bulk Production Before Final Approval
Unresolved print, fit, or branding details can create expensive rework.
Solution: Use a documented approval checkpoint before authorizing bulk production.
Planning Delivery Without Allowing for Revisions
A schedule that excludes sampling, color approval, or shipping can create unrealistic launch expectations.
Solution: Plan backward from the required delivery date and confirm the supplier’s production-start conditions.
Conclusion: Build a Repeatable Process for Your Custom Apparel Collection
Launching a successful custom printed apparel collection is a sequence of connected decisions, not a single manufacturing transaction. Buyers need to prepare production-ready artwork, understand the MOQ structure, evaluate samples, confirm Pantone color references, finalize private label details, and establish a realistic production and delivery schedule.
The most effective way to reduce sourcing risk is to document decisions before they reach the production line. Approved artwork, physical color references, a signed-off sample, clear measurement tolerances, and written inspection criteria give both buyer and manufacturer a common standard.
For wholesalers developing their own brands, a focused first collection can also make purchasing and inventory management easier. Start with a manageable range, validate product quality, and use documented results to guide repeat orders and future designs.
When evaluating a custom apparel manufacturer, look beyond the initial quotation. Prioritize clear communication, transparent MOQ terms, reliable sampling, consistent quality control, and a production plan that matches your launch requirements. These fundamentals provide a stronger foundation for building a recognizable private label and scaling your collection over time.